

Understanding Campaign Approval
What “(Unapproved)” Means
Section titled “What “(Unapproved)” Means”The (Unapproved) label means your compliance team hasn’t approved the campaign yet. It’s only for your reference: unapproved campaigns can still be assigned to leads, and their steps still send or appear on your Next Tasks list as normal.
Approval tracking is on by default. New campaigns start as unapproved. If you don’t need to track approvals, you can turn it off.
Where the Label Appears
Section titled “Where the Label Appears”You’ll see (Unapproved) next to the campaign name wherever you pick or view campaigns:
-
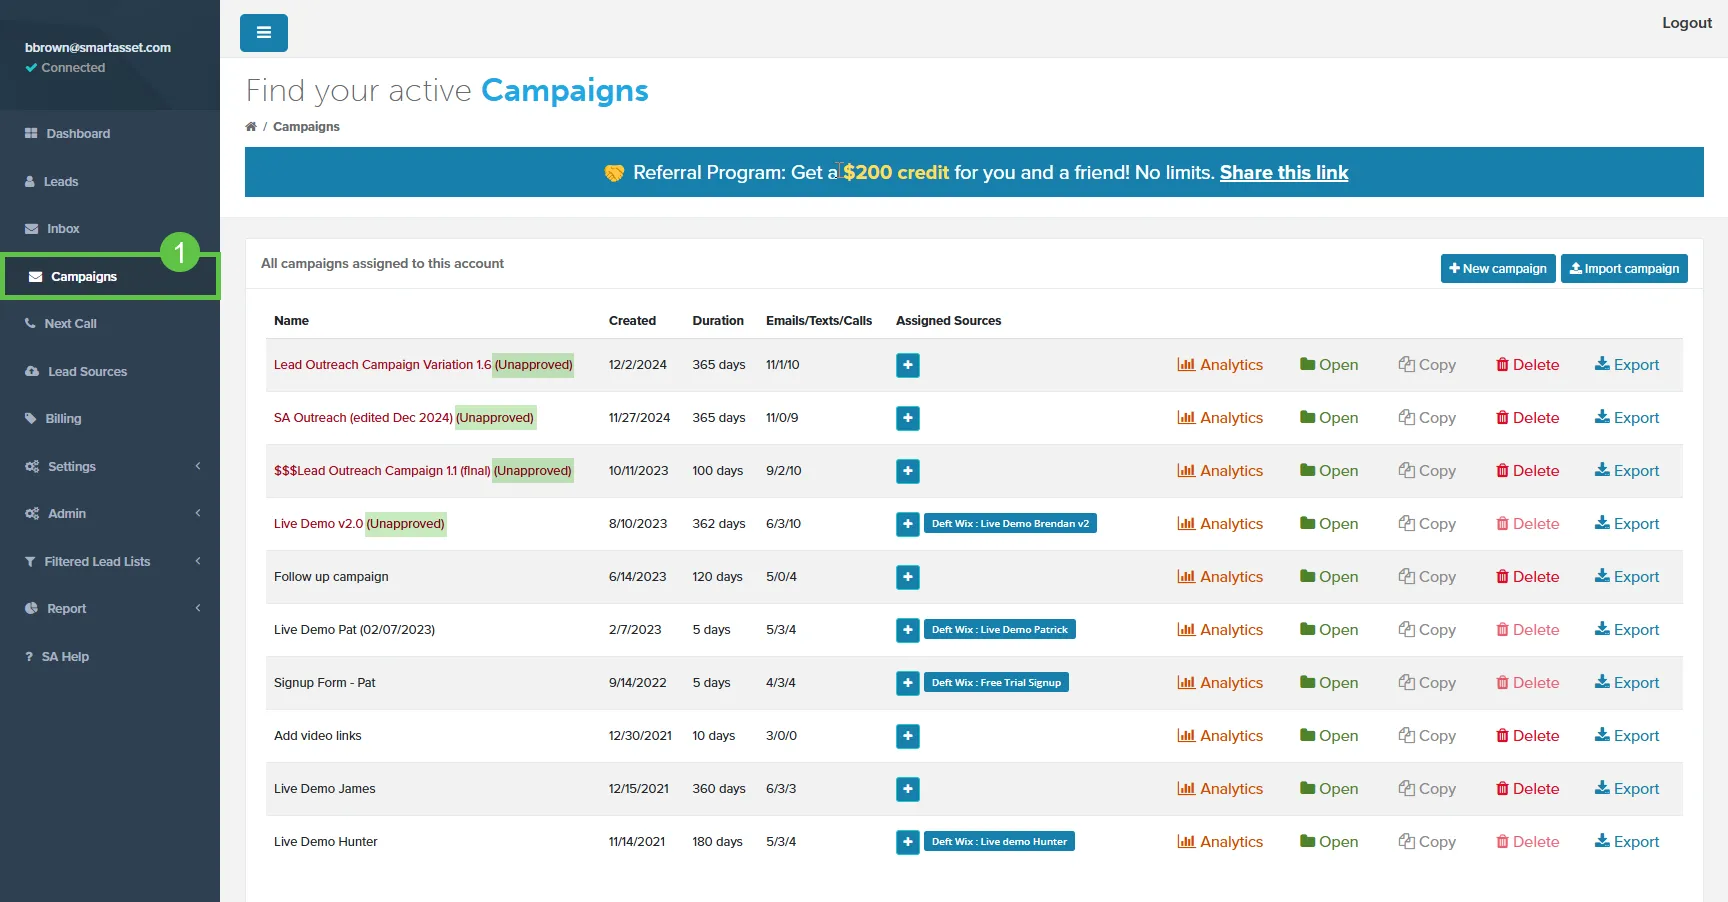
Campaigns page: next to the campaign name
-
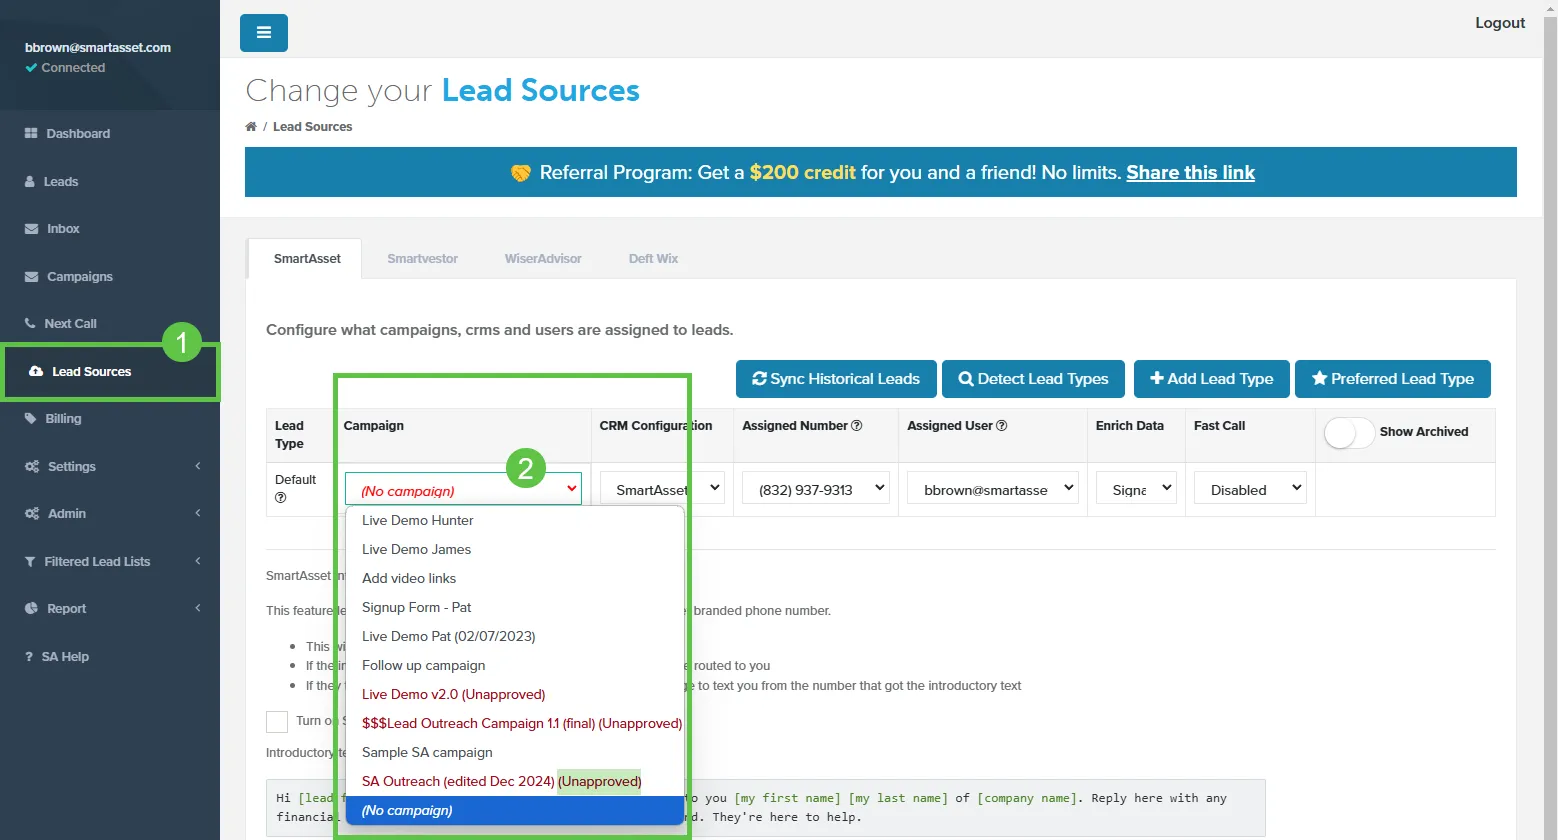
Lead Sources page: in the Campaign dropdown, for the default and each lead type
-
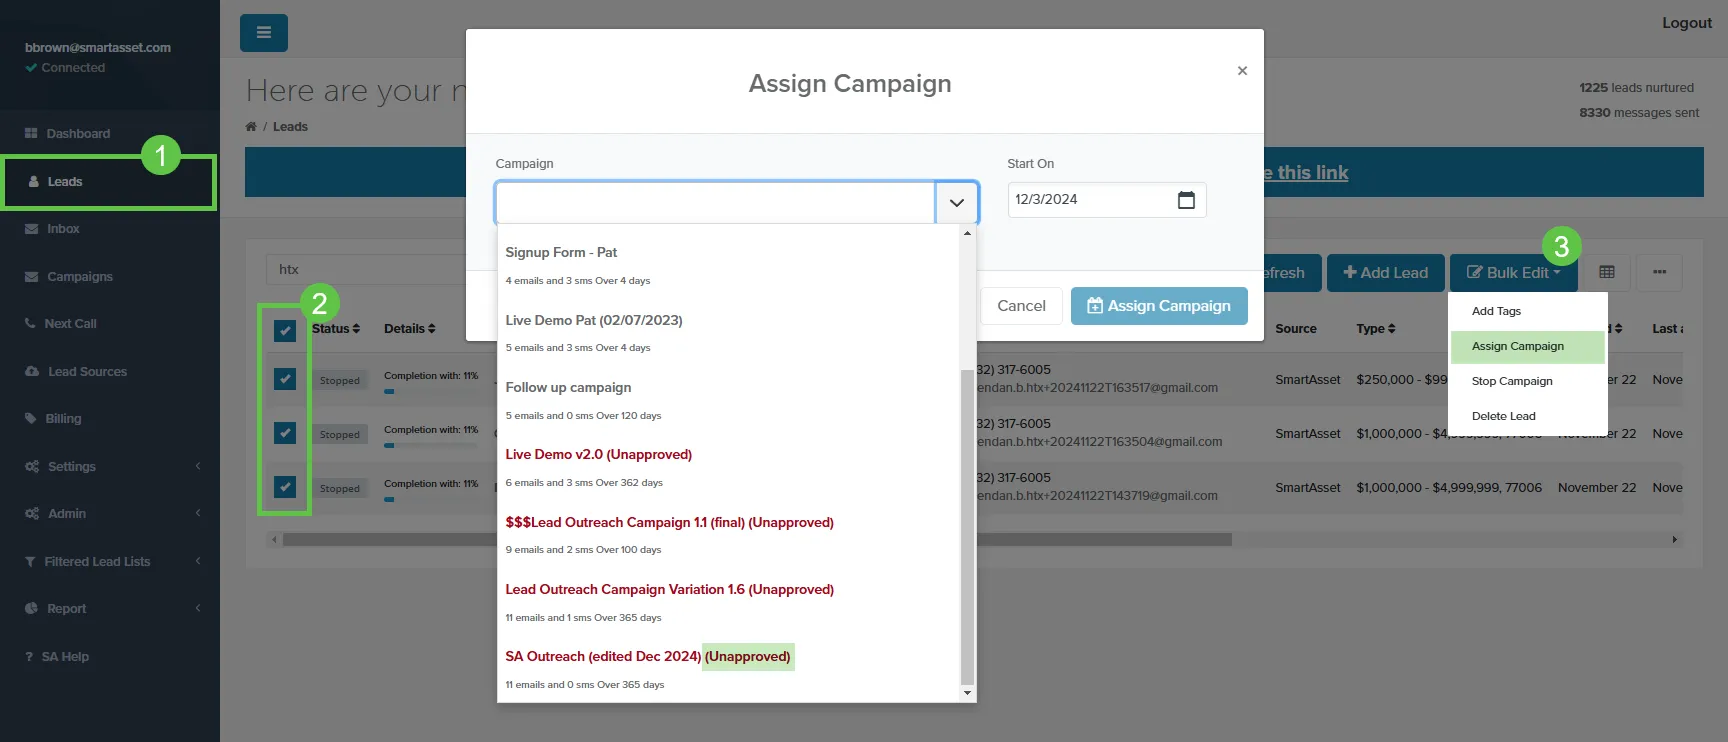
Leads page: in the Assign Campaign window (Bulk Edit > Assign Campaign)
-
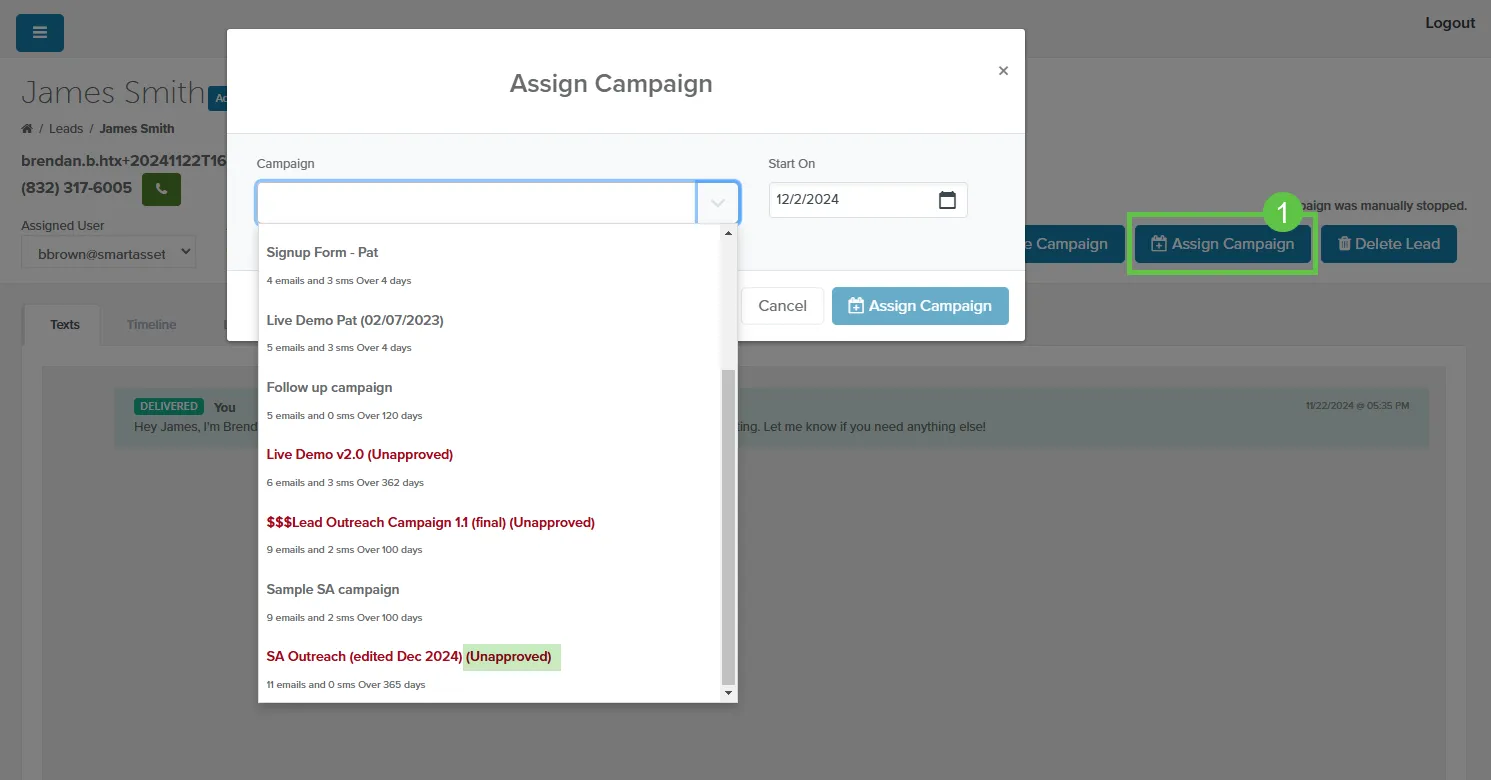
Lead details page: in the Assign Campaign window (Actions > Assign Campaign)
-
Lead import: in the Assigned Campaign dropdown on the Campaign Details step
Sending a Campaign for Review
Section titled “Sending a Campaign for Review”If someone else reviews your campaigns, use Email to Compliance to send them the full campaign. If you do the review yourself, skip ahead to Marking a Campaign Approved.
Before you begin
Section titled “Before you begin”- Connect your email. If it isn’t connected, clicking Email to Compliance shows Please connect your email to enable “Email to Compliance.” See Connect your Email.
- Make sure the campaign has at least one email or text step. Call steps aren’t sent for review.
Send the Campaign
Section titled “Send the Campaign”- On the Campaigns page, click Open next to the campaign.
- Click Email to Compliance (top right). The Email to Compliance window opens.
- In To, enter your reviewer’s email address. Your SmartAsset account manager is added in CC automatically.
- Review the Subject and message. Both are filled in for you, and you can edit them.
- Click Send. The message Email was successfully sent! appears and the window closes.
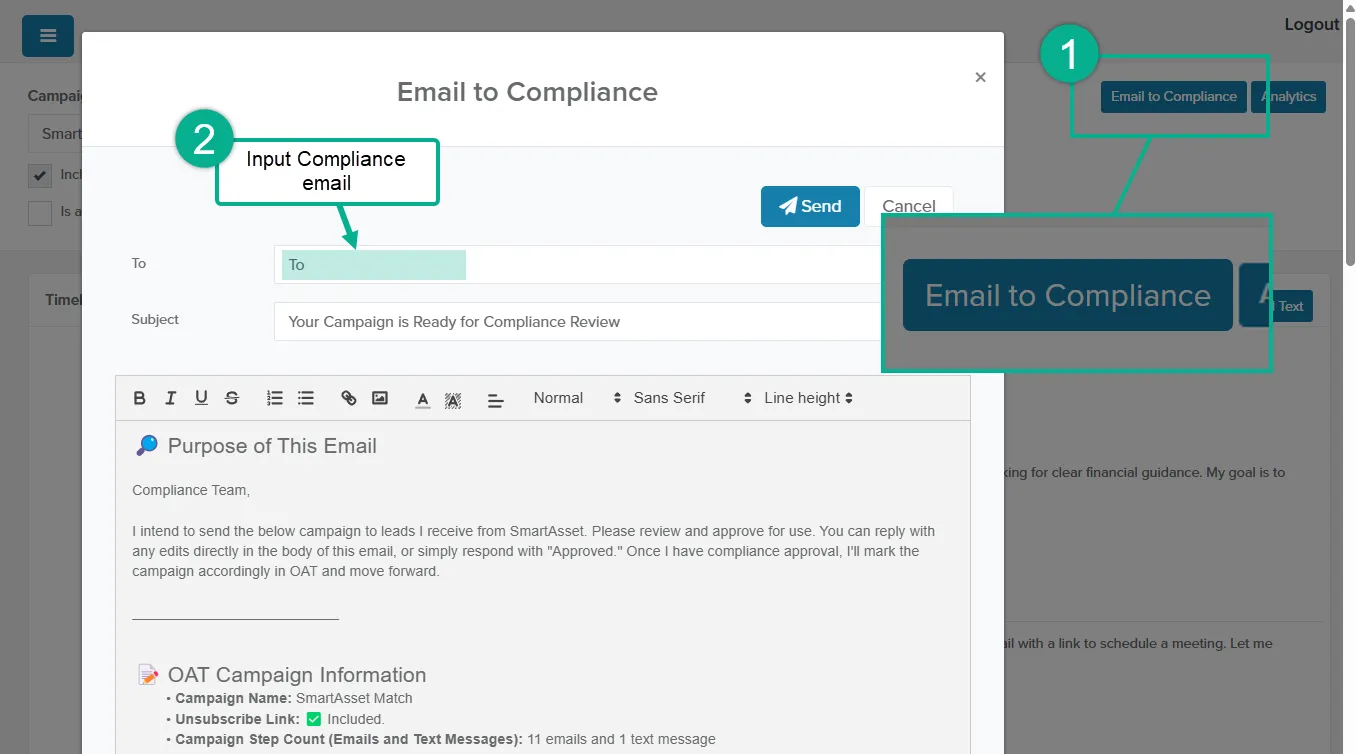
The email sends from your connected email address. It works the same whether OAT sends your campaign emails or you send them yourself. It includes:
- The campaign name and a request for your reviewer to approve it or reply with edits
- Whether the campaign includes an unsubscribe link
- A timeline of every email and text step, with its timing and content. Email steps include your default email signature.
Call steps aren’t included, since they have no message content to review.
Marking a Campaign Approved
Section titled “Marking a Campaign Approved”Once you’ve reviewed the campaign, or your reviewer has approved it:
- On the Campaigns page, click Open next to the campaign.
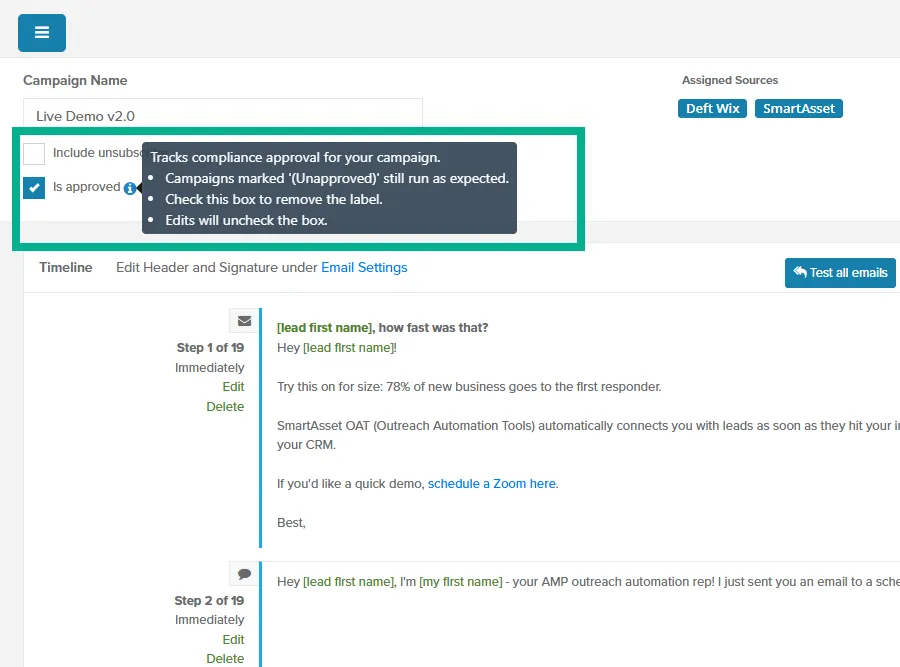
- Check the Is approved box, below Include unsubscribe at the top left. The change saves right away, and the (Unapproved) label disappears.
Turning Off Approval Tracking
Section titled “Turning Off Approval Tracking”If you don’t need to track compliance approvals, turn tracking off:
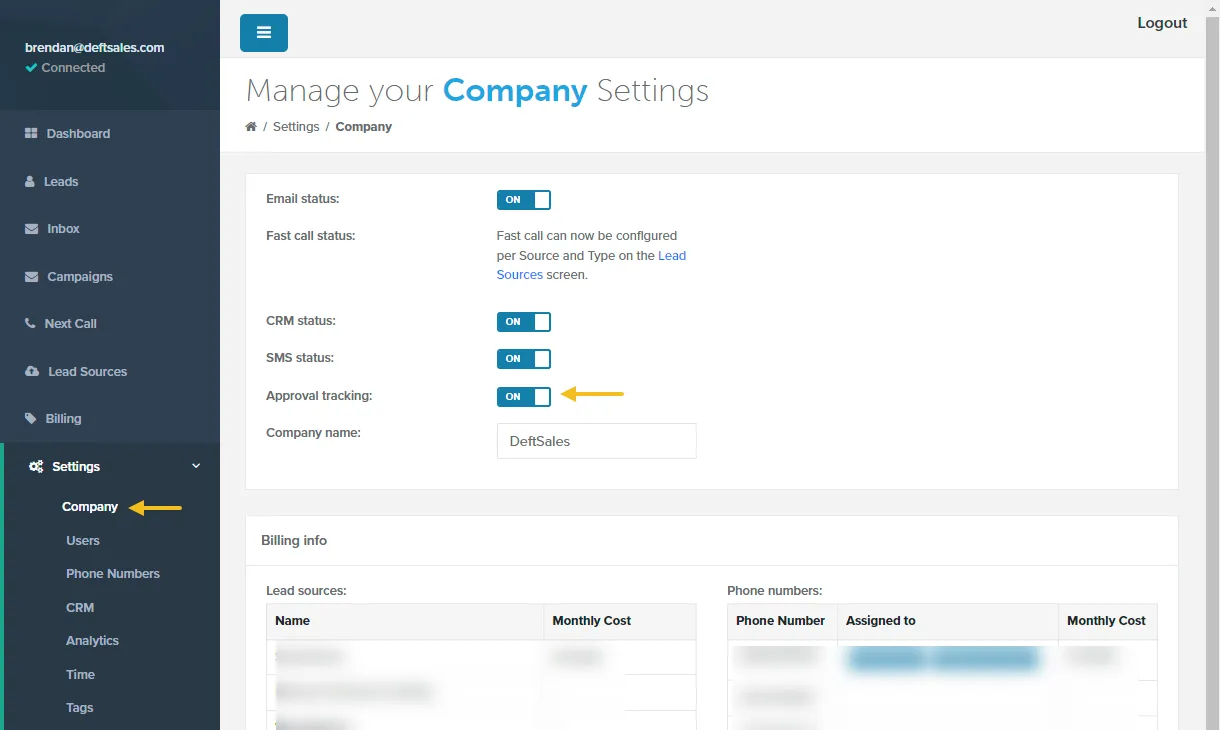
- Go to Settings > Company.
- Under Toggle Settings, turn off Approval Tracking. The change saves right away.
The (Unapproved) label and the Is approved box are hidden while it’s off. Editing a campaign while tracking is off still removes its approval, so if you turn tracking back on, campaigns you’ve edited show (Unapproved) again.
Related Guides
Section titled “Related Guides”- Campaigns: building, testing, and assigning campaigns
- Connect your Email: required before you can use Email to Compliance
- Company Settings: the Approval Tracking switch and other company switches