

CRM Integration
Connect your CRM to eliminate manual data entry and automatically sync leads.
What It Does
Section titled “What It Does”- New prospects show up in your CRM automatically: their contact details and SmartAsset survey answers.
- Your outreach history is saved for you: calls, texts, and emails can be logged in your CRM (not available for Smart Office or Zoho).
- It fits how you already use your CRM: choose where information goes, like lead status, source, tags, owner, and custom fields.
- Different setups for different lead sources: if you handle leads differently by source or lead type, you can set up more than one configuration.
- Dependable syncing: if there is a temporary connection issue, OAT retries several times in the background. Activity logged to your CRM shows Synced to CRM, Sync scheduled, or Sync failed on the lead’s timeline.
Supported CRMs
Section titled “Supported CRMs”OAT integrates with Salesforce, Hubspot, Wealthbox, Redtail, Smart Office, Pipedrive, and Zoho. Zoho imports contact details only; it doesn’t use CRM configurations or log activity.
Don’t see your CRM? Email amphelp@smartasset.com to request it.
1. Connect Your CRM
Section titled “1. Connect Your CRM”-
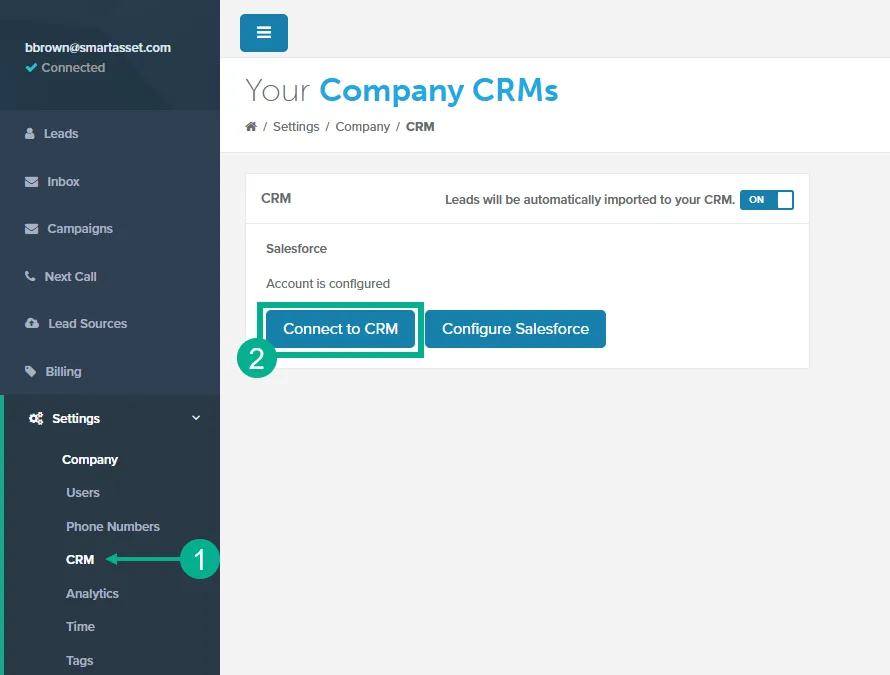
To open this page, go to Settings > CRM.
-
Click Connect to CRM. The CRM Configuration window opens.
-
Click your CRM’s tab.
-
Connect your account:
- Salesforce, Hubspot, Wealthbox, or Zoho: click Connect to and your CRM’s name, then sign in to your CRM and allow access.
- Redtail: enter your Username and Password, then click Save changes.
- Smart Office: enter your Office Name, Site Name, and User Name, then click Connect to Smart Office.
- Pipedrive: enter your Api Key and Company Domain, then click Save changes.
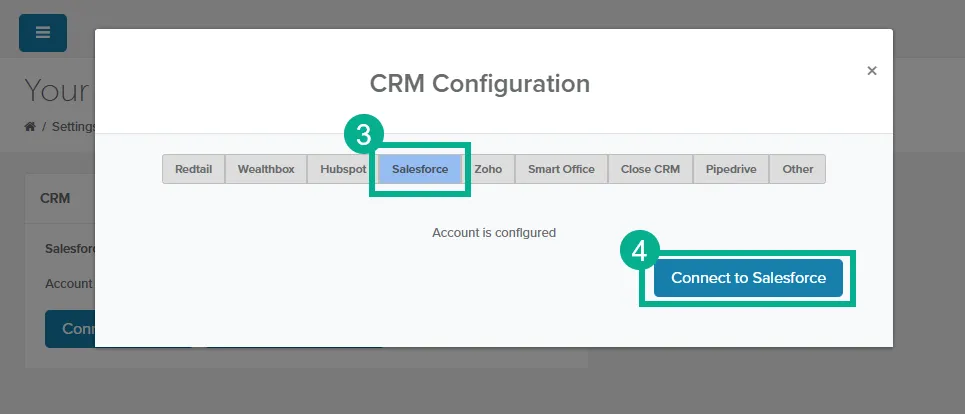
Your CRM now appears on the CRM page, and new leads start going to it automatically.
For Redtail and Salesforce setup details, see Redtail Integration Guide and Salesforce Integration Guide.
2. Set Up a CRM Configuration
Section titled “2. Set Up a CRM Configuration”A CRM configuration controls what OAT sends to your CRM, such as lead status, source, tags, and owner. OAT creates your first configuration the first time you open your CRM’s configuration page; you can edit it or add more.
-
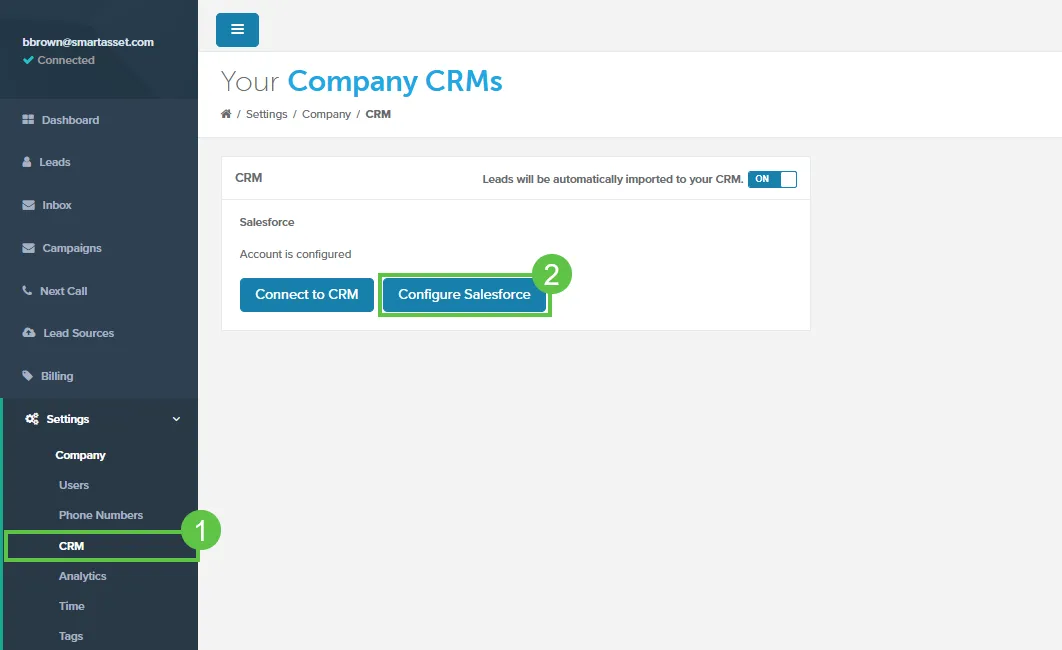
To open this page, go to Settings > CRM.
-
Click Configure and your CRM’s name, for example Configure Salesforce.
-
To add another configuration, click Add Configuration. Otherwise, click the configuration’s tab.
-
Choose the settings, such as status, source, and tags.
-
In Name (Configuration Name for Salesforce), enter a name you’ll recognize on the Lead Sources page.
-
Click Save.
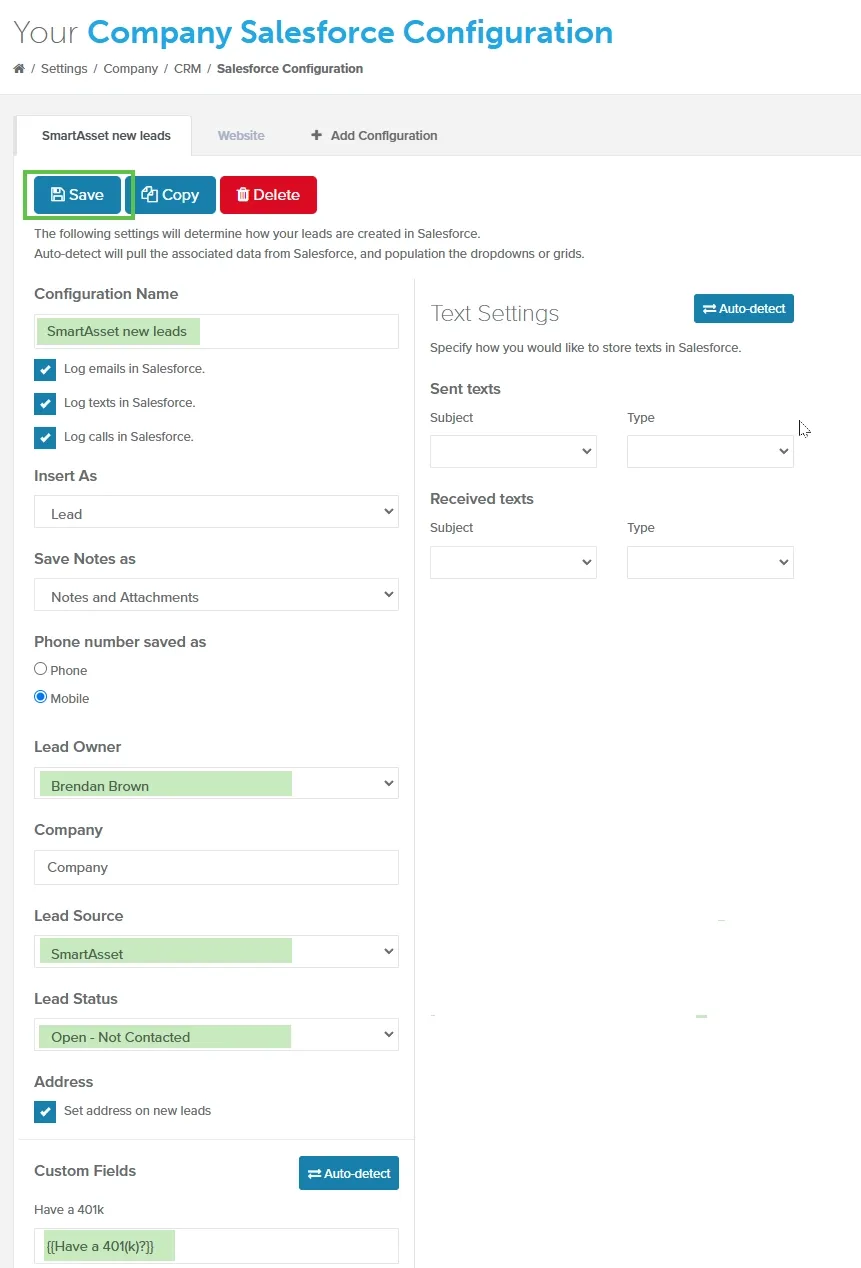
Your configuration is ready to assign to a lead source.
3. Assign Your CRM Configuration
Section titled “3. Assign Your CRM Configuration”-
In the side nav, click Lead Sources.
-
In the CRM Configuration column, choose a configuration for the Default row. To use a different one for a lead type, choose it in that lead type’s row. (Just Contact Info) sends only contact details, and (No CRM Configuration) keeps those leads out of your CRM.
-
Click Save and the source name, for example Save SmartAsset Settings.
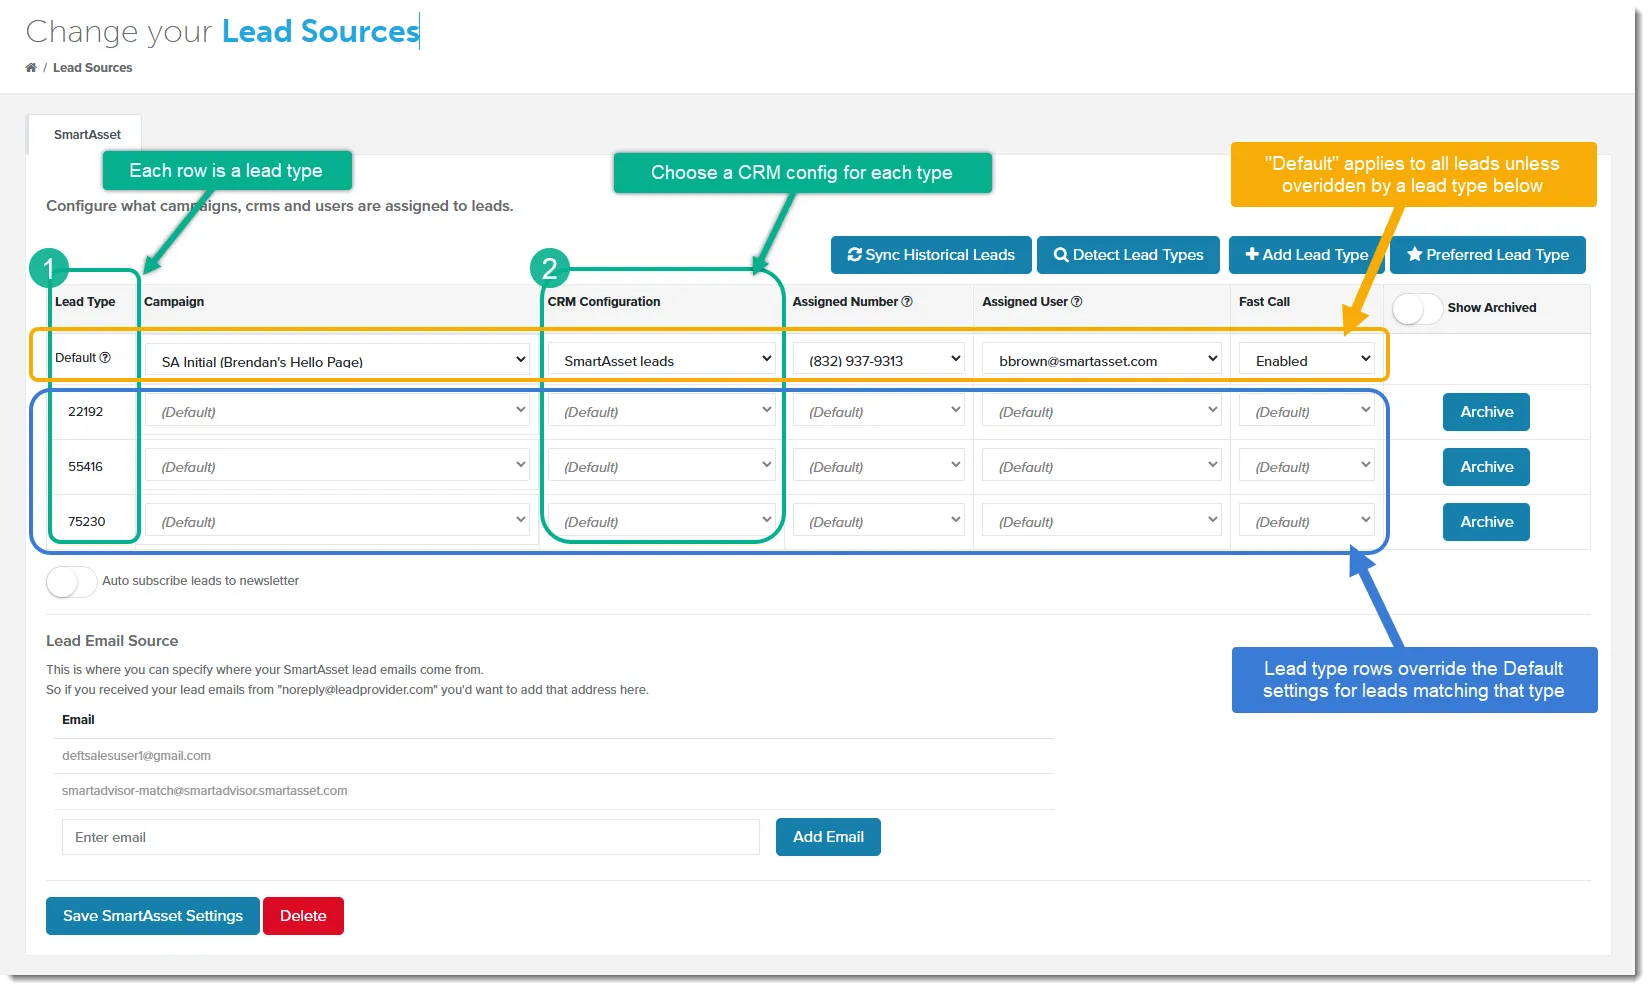
New leads from that source now use the chosen configuration. A lead type row overrides the Default row.
Automatic vs. Manual Sync
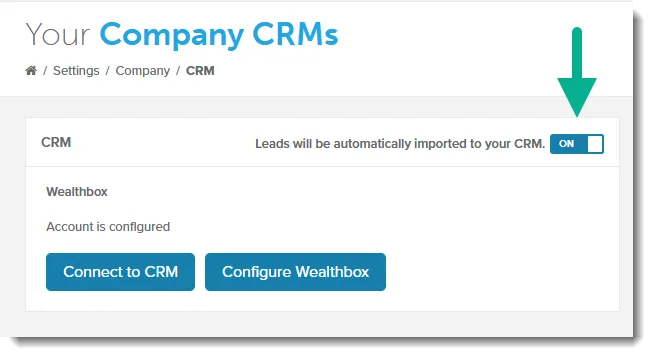
Section titled “Automatic vs. Manual Sync”Choose how leads are added to your CRM. Turn the CRM switch on or off in either place:
- Settings > Company, with the Push to CRM switch
- Settings > CRM, with the switch next to CRM
When it’s on, new leads go to your CRM automatically. When it’s off, you push leads yourself.
Push leads to your CRM manually
Section titled “Push leads to your CRM manually”- In the side nav, click Leads.
- Select the leads you want to push.
- Click Bulk Edit > Push to CRM.
- Click Yes.
The leads are queued and reach your CRM within a few minutes. Leads already in your CRM are skipped.
Related Guides
Section titled “Related Guides”- Redtail Integration Guide: Redtail configuration options, workflows, and activities
- Salesforce Integration Guide: Salesforce record types, notes, and custom fields
- Lead Sources: Routing & Automation: where CRM configurations are assigned to lead sources
- Company Settings: the Push to CRM switch