

Lead Details Screen
The lead’s page shows everything about one lead: contact details, survey answers, a timeline of activity, and your text conversation. From it you can tag the lead, edit their details, add notes, reassign them, and stop, resume or assign their campaign.
Opening a Lead’s Page
Section titled “Opening a Lead’s Page”- In the side menu, click Leads.
- Click the lead’s name or Details. The lead’s page opens.
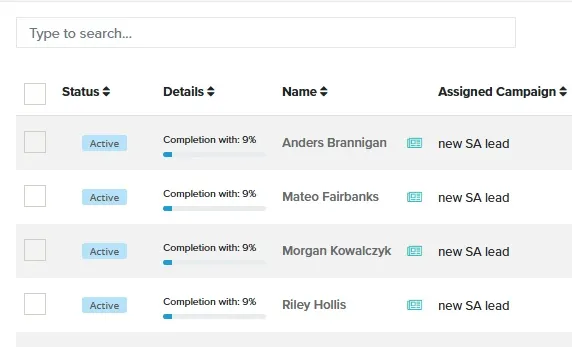
What’s on the Lead’s Page
Section titled “What’s on the Lead’s Page”- Details: contact details, status, Assigned User, Assigned Number, assigned campaign, and survey answers.
- Timeline: every event for the lead, such as CRM imports, campaign steps, replies, notes and meetings. Check Show all future steps to see upcoming campaign steps, or click Filter to narrow the list.
- Next Tasks: the lead’s open tasks. To add a one-off call, email or text task, click Add Task.
- Text Messages: your text conversation with the lead. Click Show or Hide to open or close it.
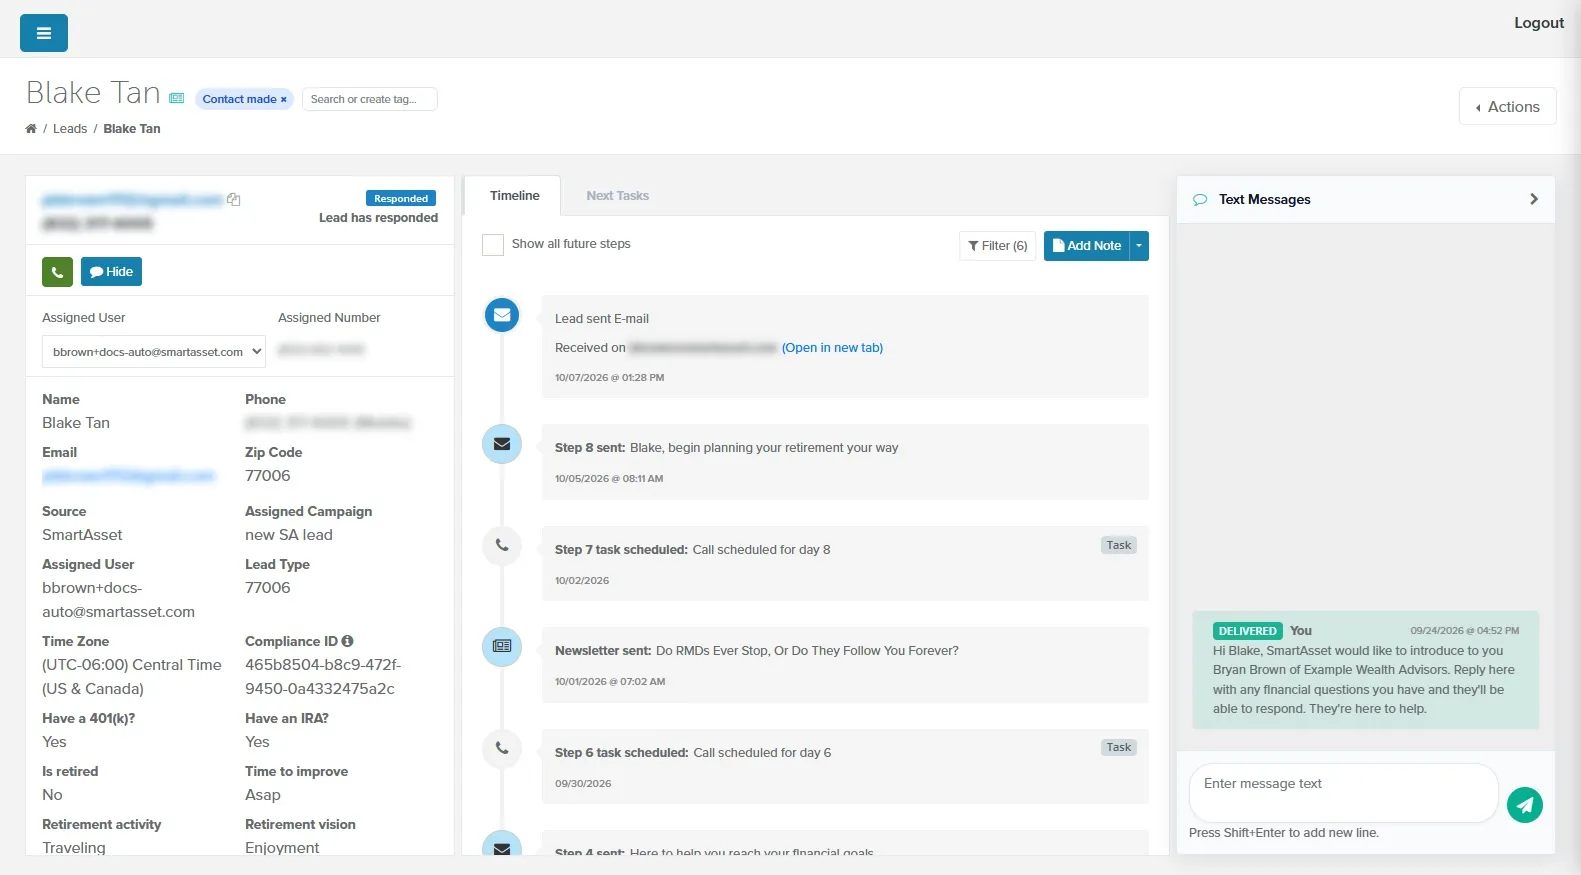
Managing Lead Information
Section titled “Managing Lead Information”- Tags: type in the Search or create tag… box next to the lead’s name.
- Contact details: click Actions > Edit Lead, change the fields, and click Save.
- Notes: click Add Note in the timeline, type the note, and click Save Note. When a CRM is connected, new notes are also added to the lead’s contact in your CRM (except Zoho and Smart Office). Later edits to a note don’t sync.
- Assigned user: choose a user in the Assigned User list. The change saves right away. Campaign emails then send from the new user’s connected email, and the lead’s next tasks and call-backs go to the new user.
- Calling: click the green phone button to call the lead.
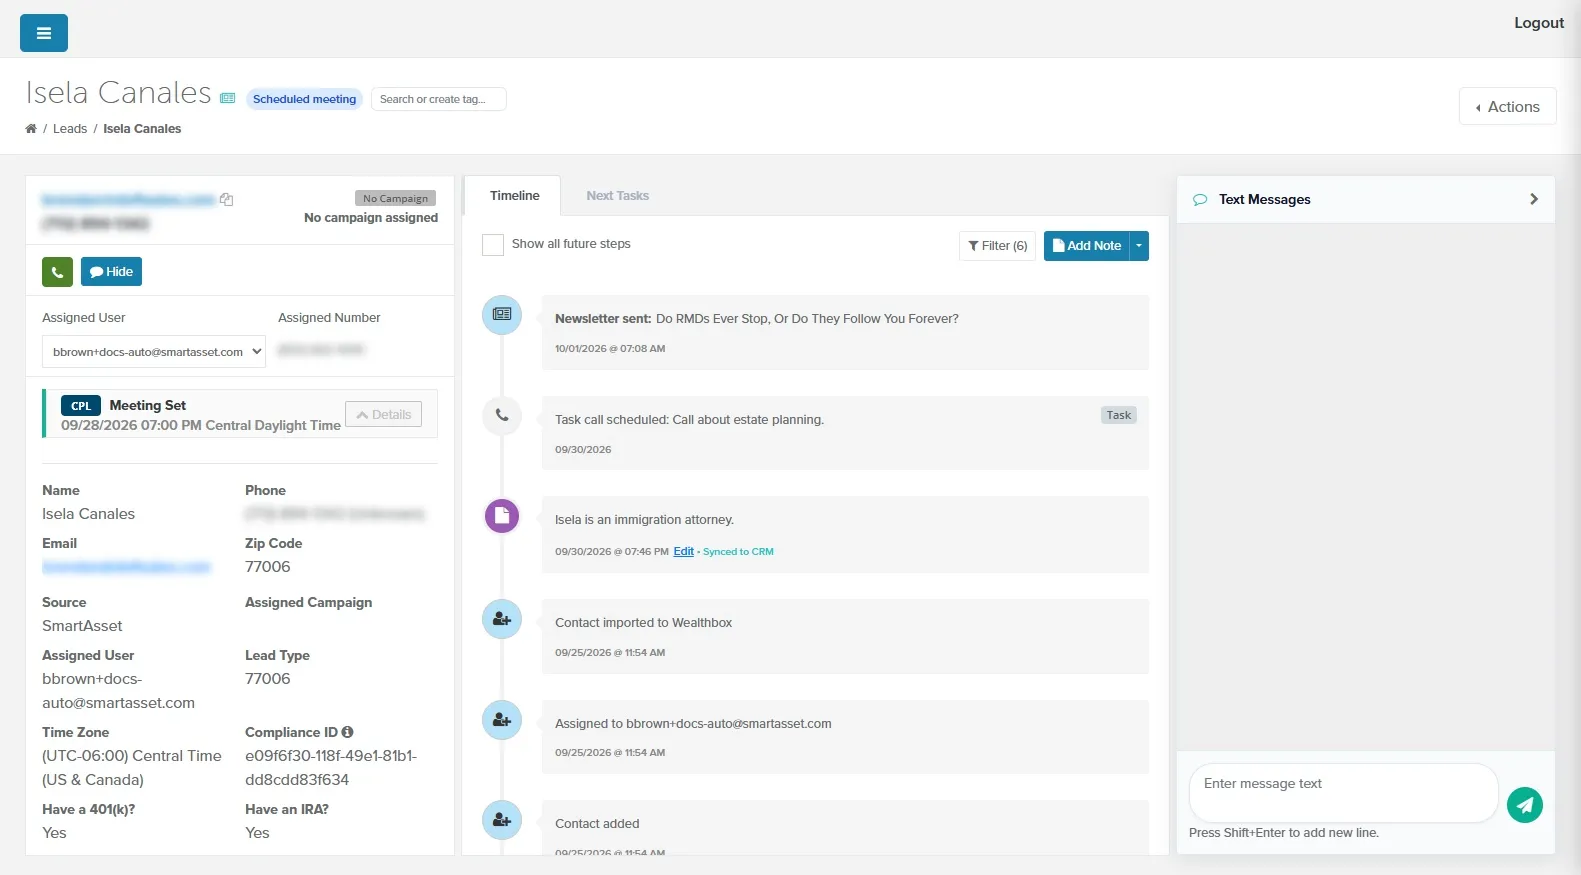
Manually Logging a Scheduled Meeting
Section titled “Manually Logging a Scheduled Meeting”If you book a meeting with a lead outside your scheduling tool (such as Calendly, OnceHub or Microsoft Bookings), log it yourself. This keeps your tracking and reports accurate.
-
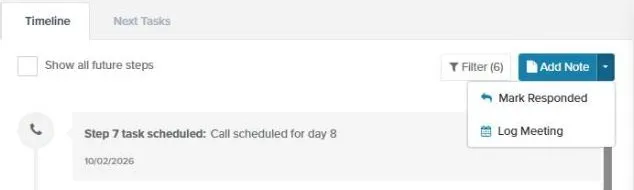
On the lead’s page, in the Timeline, click the arrow next to Add Note.
-
Click Log Meeting. The Log Meeting window opens.
-
In Meeting date, pick the date of the meeting.
-
Click Save.
The lead’s status changes to Responded, which stops their campaign, and the Contact made and Meeting set tags are added. The meeting counts in the Scheduled Meetings section of the Pipeline Report.
Marking a Lead as Responded
Section titled “Marking a Lead as Responded”If a lead picks up your outgoing call, or responds some other way OAT can’t see, mark them as responded.
- On the lead’s page, in the Timeline, click the arrow next to Add Note.
- Click Mark Responded. The Mark Responded window opens.
- In Response date, pick the date. Future dates aren’t allowed.
- Click Save.
The lead’s status changes to Responded, which stops their campaign, and the Contact made tag is added. The lead counts in Responded Leads in the Pipeline Report. Mark Responded appears only for leads that haven’t already replied.
Stopping, Resuming or Assigning a Campaign
Section titled “Stopping, Resuming or Assigning a Campaign”The Actions menu shows only the campaign options that fit the lead:
- Stop Campaign: the campaign is Active and has steps left to send.
- Resume Campaign: the campaign was stopped and still has unsent steps.
- Assign Campaign: the campaign was stopped, or has no steps left.
Campaigns also stop on their own when a lead responds (including Log Meeting and Mark Responded), unsubscribes or opts out, and when they finish.
Stopping a Campaign
Section titled “Stopping a Campaign”-
On the lead’s page, click Actions > Stop Campaign.

-
Click Yes to confirm.
The Lead campaign has been stopped. message appears, and the lead’s status changes to Stopped.
Resuming a Campaign
Section titled “Resuming a Campaign”- On the lead’s page, click Actions > Resume Campaign. The Resume Campaign window opens and says whether the campaign picks up where it left off or shifts its remaining steps to start today.
- Optional: Clear Include emails, Include text messages or Include scheduled calls to drop those steps.
- Click Resume Campaign.
The lead’s status changes to Active.
Assigning a Campaign
Section titled “Assigning a Campaign”-
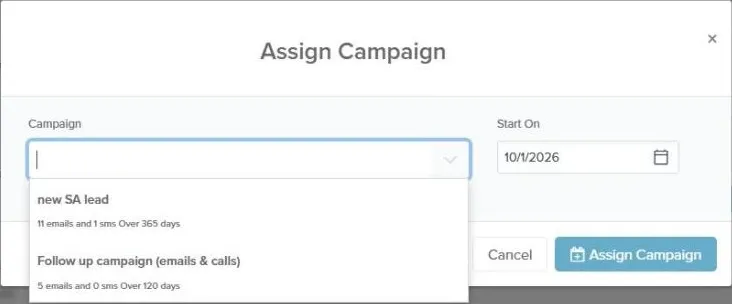
On the lead’s page, click Actions > Assign Campaign. The Assign Campaign window opens.
-
In Campaign, select a campaign.
-
Optional: In Start On, pick a start date. It defaults to today.
-
Click Assign Campaign.
The lead’s status changes to Active. To see the campaign’s upcoming steps, check Show all future steps on the Timeline.
Unsubscribing a Lead
Section titled “Unsubscribing a Lead”Unsubscribing stops all campaign and newsletter emails to a lead.
- On the lead’s page, click Actions > Unsubscribe.
- Click Yes to confirm.
The lead’s status changes to Unsubscribed, and their campaign stops. Email tasks you add yourself from the Next Tasks tab can still be sent.
To undo it, click Actions > Resubscribe and confirm. Resubscribe is unavailable when the lead unsubscribed with the link in an email.
Related Guides
Section titled “Related Guides”- Leads Screen: lead statuses, the toolbar, and exporting or importing leads
- Tagging Leads: built-in tags such as Contact made and Meeting set
- Texting Features: sending and receiving texts from the lead’s page
- Next Tasks: working your daily task list, including one-off tasks
- Pipeline Report: where logged meetings and responses are counted