

Tagging Leads
Introduction to Tags
Section titled “Introduction to Tags”Tags help you organize and track your leads. Use them to group leads by where they are in your process, such as whether you’ve made contact or held a meeting. You can then filter your list to focus on the right people.
Built-in Tags
Section titled “Built-in Tags”The portal comes with ready-made tags. Some are added for you automatically, and others you add yourself.
| Tag | Description | How it’s added |
|---|---|---|
| Live connected | The SmartAsset concierge team connected this lead with you over a Live Connection. | Automatically |
| Scheduled meeting | This lead arrived with a meeting already scheduled by the SmartAsset concierge team. | Automatically |
| Contact made | Added when a lead replies by email or text, calls you, or books a meeting through your connected scheduling link or calendar. Also added when you log a meeting or select Mark Responded on the lead’s Timeline tab. | Automatically |
| Meeting set | Added when a lead books a meeting through your connected scheduling link or calendar. To add it yourself, log the meeting: on the lead’s Timeline tab, open the menu next to Add Note and select Log Meeting. | Automatically, or when you log a meeting |
| Meeting held | The meeting happened. | You add it |
| Meeting canceled | The meeting was canceled. | You add it |
| Investor no show | The investor didn’t show up. | You add it |
| Contact attempted | You’ve reached out to the lead but haven’t connected yet. | You add it |
| Presenting a recommendation/plan | You’re presenting a recommendation or financial plan to the lead. | You add it |
| Documents gathering | You’re collecting documents from the lead. | You add it |
| Client conversion | The lead has become a client. | You add it |
| Disqualified | The lead isn’t a fit for your practice. | You add it |
| Investor not interested | The lead has told you they’re not interested. | You add it |
You can’t add or remove Live connected or Scheduled meeting yourself; OAT manages them. Add a meeting outcome tag — Meeting held, Meeting canceled, or Investor no show — after every scheduled meeting to record what happened. Use the remaining tags to track where each lead stands in your process.
How to Add and Manage Tags
Section titled “How to Add and Manage Tags”Adding a Tag
Section titled “Adding a Tag”-
Go to Leads.
-
Click the lead’s name. The lead’s details page opens.
-
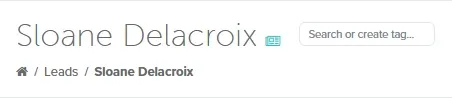
Click the Search or create tag… box next to the lead’s name. A list of tags opens.
-
Type a tag name. The list shows matching tags, plus Create “…” to make a new one.
-
Click the tag in the list, or press Enter or Tab to add the highlighted one. The tag appears next to the lead’s name.
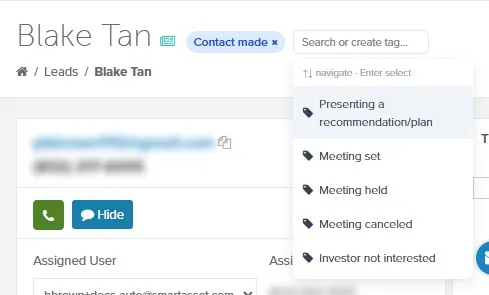
- To remove a tag from a lead, click the x on the tag.
Adding Tags to Several Leads
Section titled “Adding Tags to Several Leads”-
Go to Leads.
-
Select the checkbox next to each lead you want to tag.
-
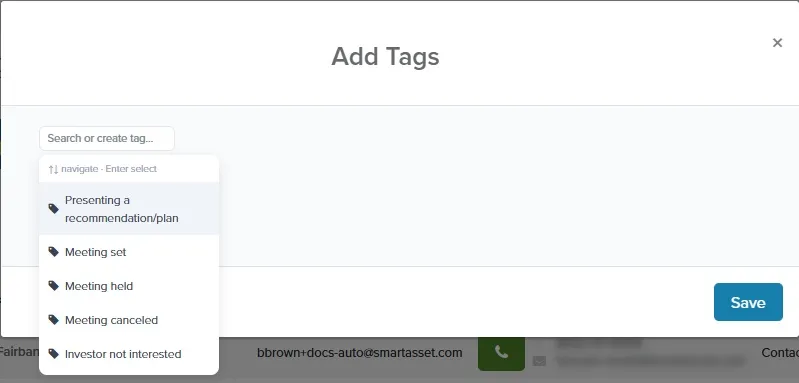
Click Bulk Edit > Add Tags. The Add Tags window opens.
-
Click the Search or create tag… box. A list of tags opens.
-
Select a tag. It appears in the window. To add another tag, repeat steps 4 and 5.
-
Click Save.
The tags are added to every selected lead.
Managing Tags in Settings
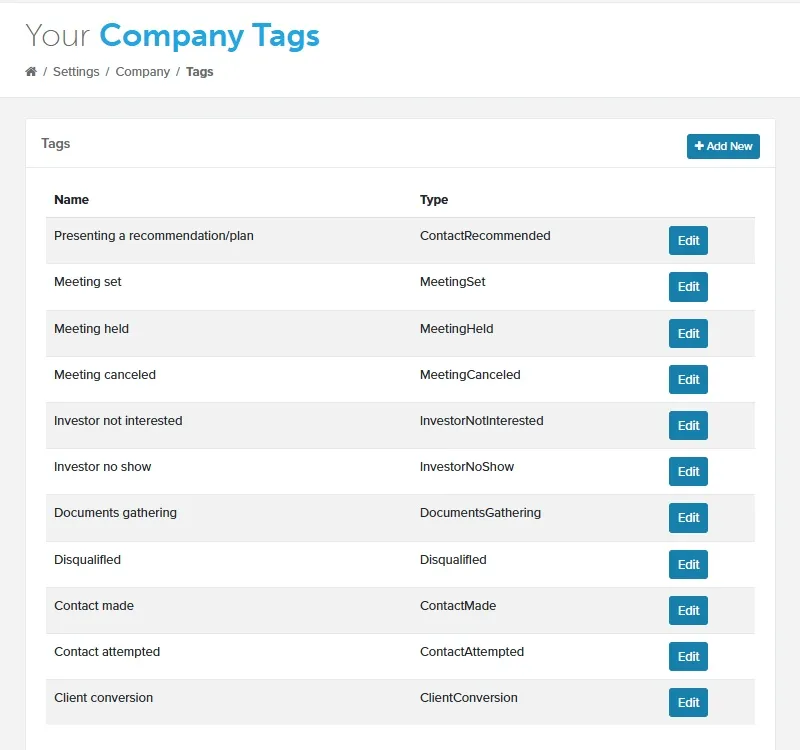
Section titled “Managing Tags in Settings”To open this page, go to Settings > Tags. The Your Company Tags page lists your built-in tags and any you’ve created. Live connected and Scheduled meeting aren’t listed, because OAT adds them for you.
To add a tag:
- Click Add New. The Create Tag window opens.
- In Tag Name, enter the tag’s name.
- Click Save. The tag appears in the Tags list with the type Custom.
To rename a tag:
- Click Edit next to the tag. The Edit Tag window opens.
- Change the Tag Name.
- Click Save.
To delete a tag you created:
- Click Delete next to the tag. The Delete Tag window opens and shows how many leads have the tag.
- Click Delete. The tag is removed from the list.
Only tags of type Custom can be deleted. You can rename built-in tags, but not delete them.
Related Guides
Section titled “Related Guides”- Filtering your Leads: filter your lead list by tags, status, and other criteria
- Lead Details Screen: log a meeting yourself, which adds the Meeting set tag
- Notifications: turn post-meeting feedback reminders on or off