Company Settings
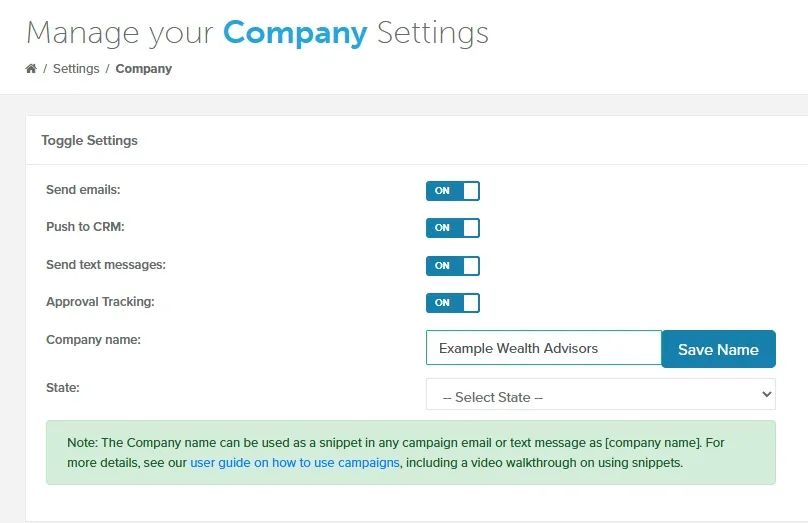
Manage your feature settings
Section titled “Manage your feature settings”These settings apply to everyone on your company’s account, and you can change them at any time. To open this page, go to Settings > Company.
- Send emails: turn off to stop sending emails. You need a connected email before you can change it.
- Push to CRM: turn off to add leads to your CRM yourself instead of automatically. It’s available once a CRM is connected.
- Send text messages: turn off if you don’t plan to text leads.
- Approval Tracking: turn off to stop tracking whether campaigns are approved.
Add your company name
Section titled “Add your company name”Your company name appears in automated emails and text messages. It applies to everyone on your account.
- Go to Settings > Company.
- In the Company name box, type your company name as you want it to appear.
- Click Save Name. The button appears only after you change the name.
Add the company name snippet to a campaign email
Section titled “Add the company name snippet to a campaign email”- Go to Campaigns.
- Next to the campaign, click Open.
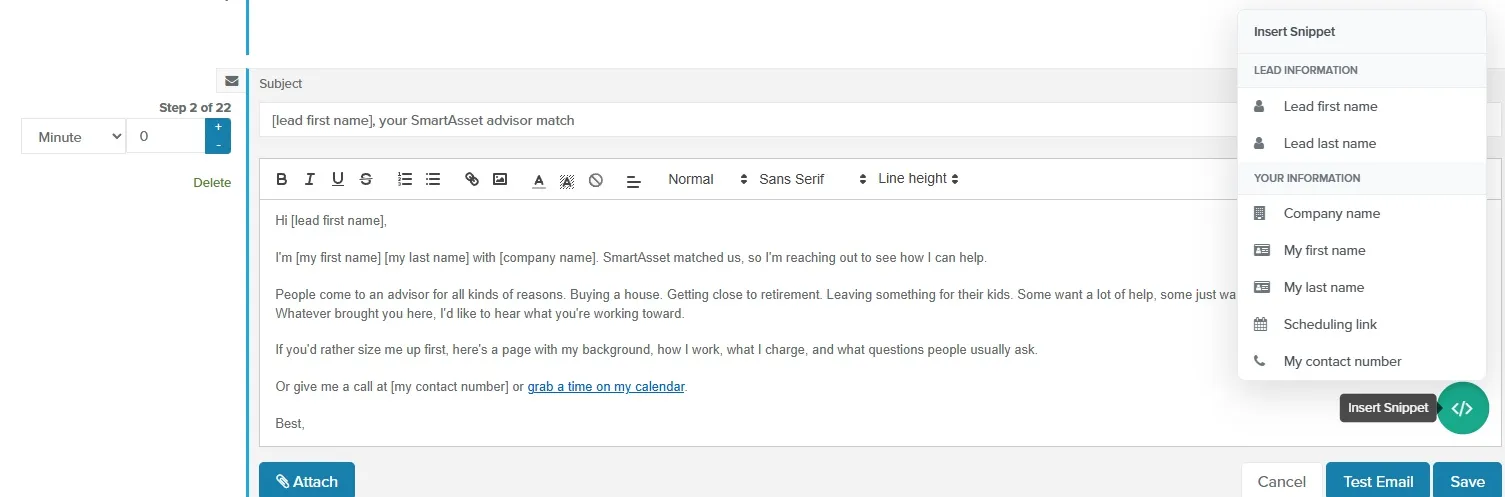
- Under the email’s step number, click Edit. The email editor opens.
- Click in the subject or body where you want the company name to appear.
- Click the
</>Insert Snippet button at the bottom right of the email body. The snippet menu opens. - Select Company name.
[company name]appears in the editor. - Click Save.
When the email is sent, [company name] is replaced with the company name from your Company Settings. If no company name is saved, it’s replaced with nothing, so add your company name first.