

How to Import Leads
Add leads in bulk by uploading a CSV file. Each lead gets the campaign, tags, and user you choose during the import.
Import Leads from a CSV File
Section titled “Import Leads from a CSV File”-
Go to Leads.
-
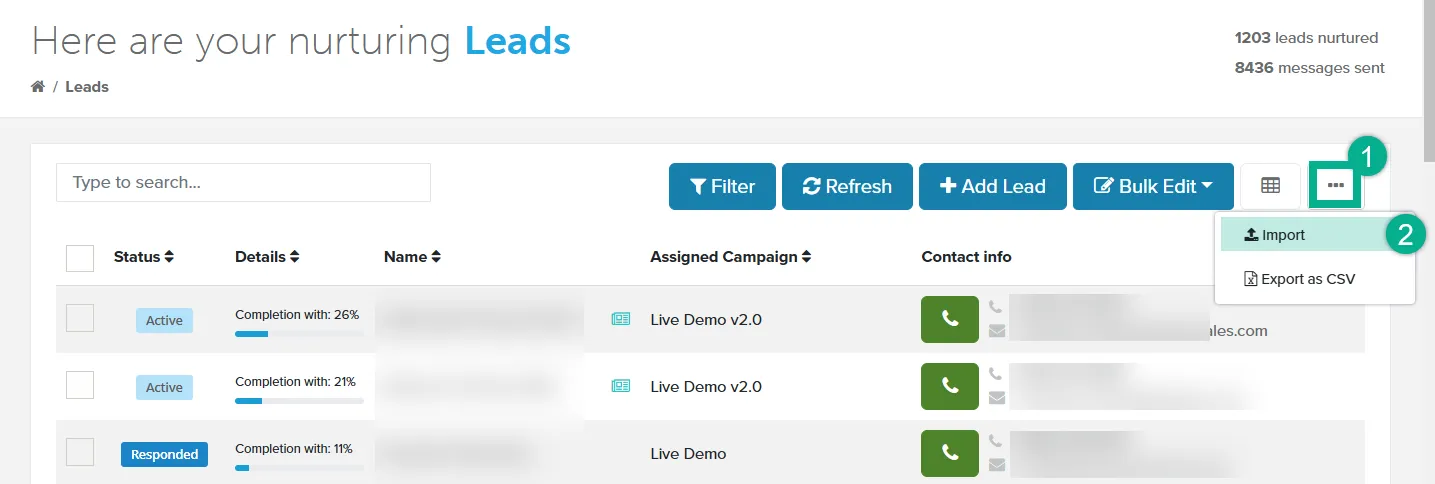
Click the three-dot button at the top right of the leads table, then click Import. The Import your Leads page opens on the Select csv step.
-
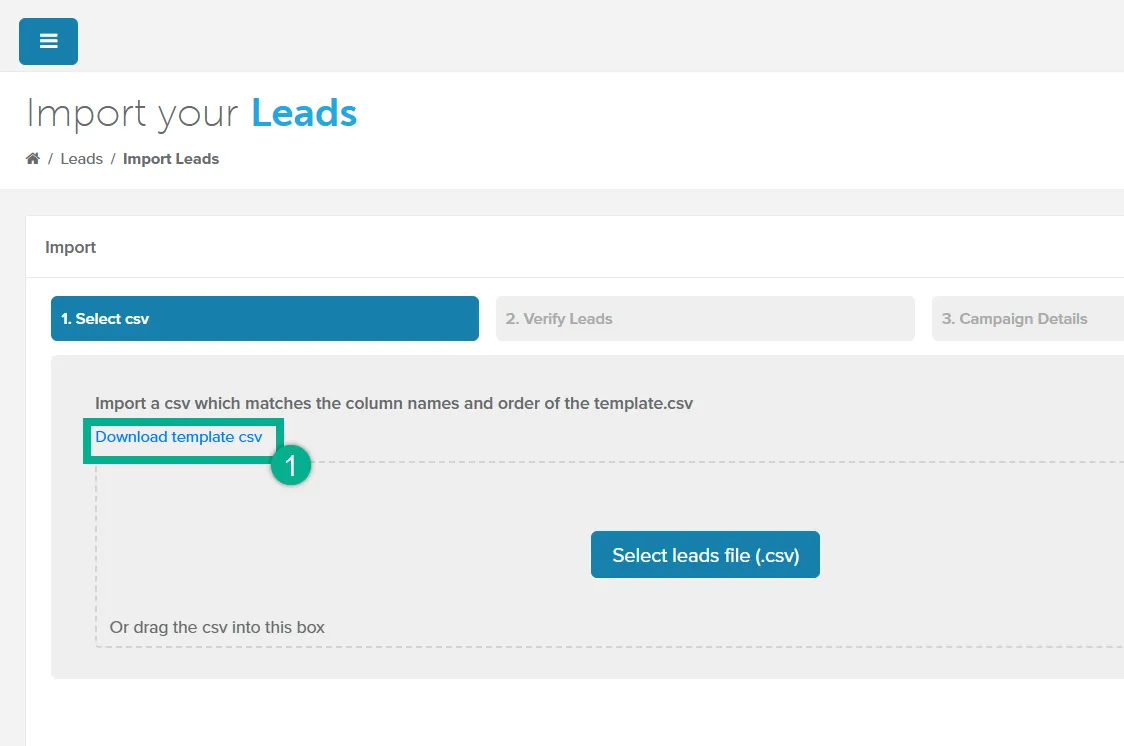
Click Download template csv. A file named template.csv downloads.
-
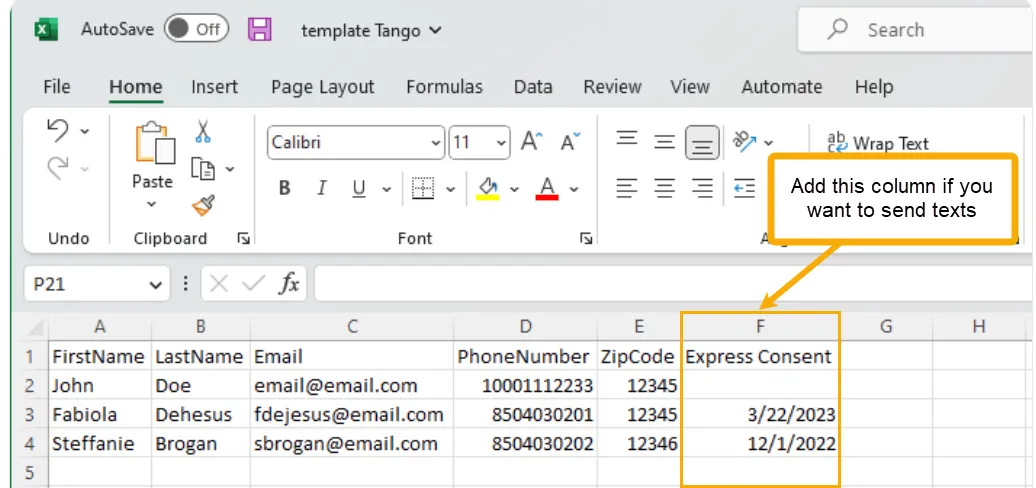
Fill in one lead per row, keeping the template’s columns and their order. To send text messages to imported leads, add an Express Consent column (see Template Rules).
-
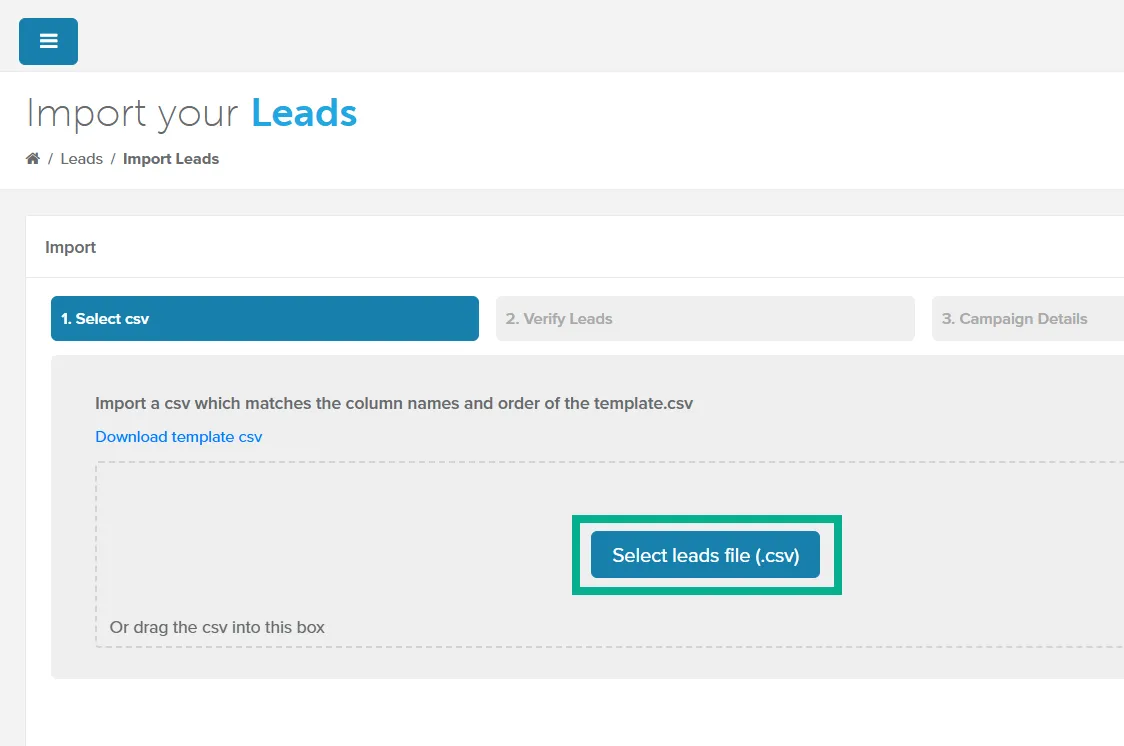
Click Select leads file (.csv) and choose your file, or drag the file into the box. The Verify Leads step opens and lists each lead with any errors.
-
Review the leads in the list. Rows with errors aren’t imported. To fix them, correct your file, click Previous, and upload it again.
-
Click Next. The Campaign Details step opens.
-
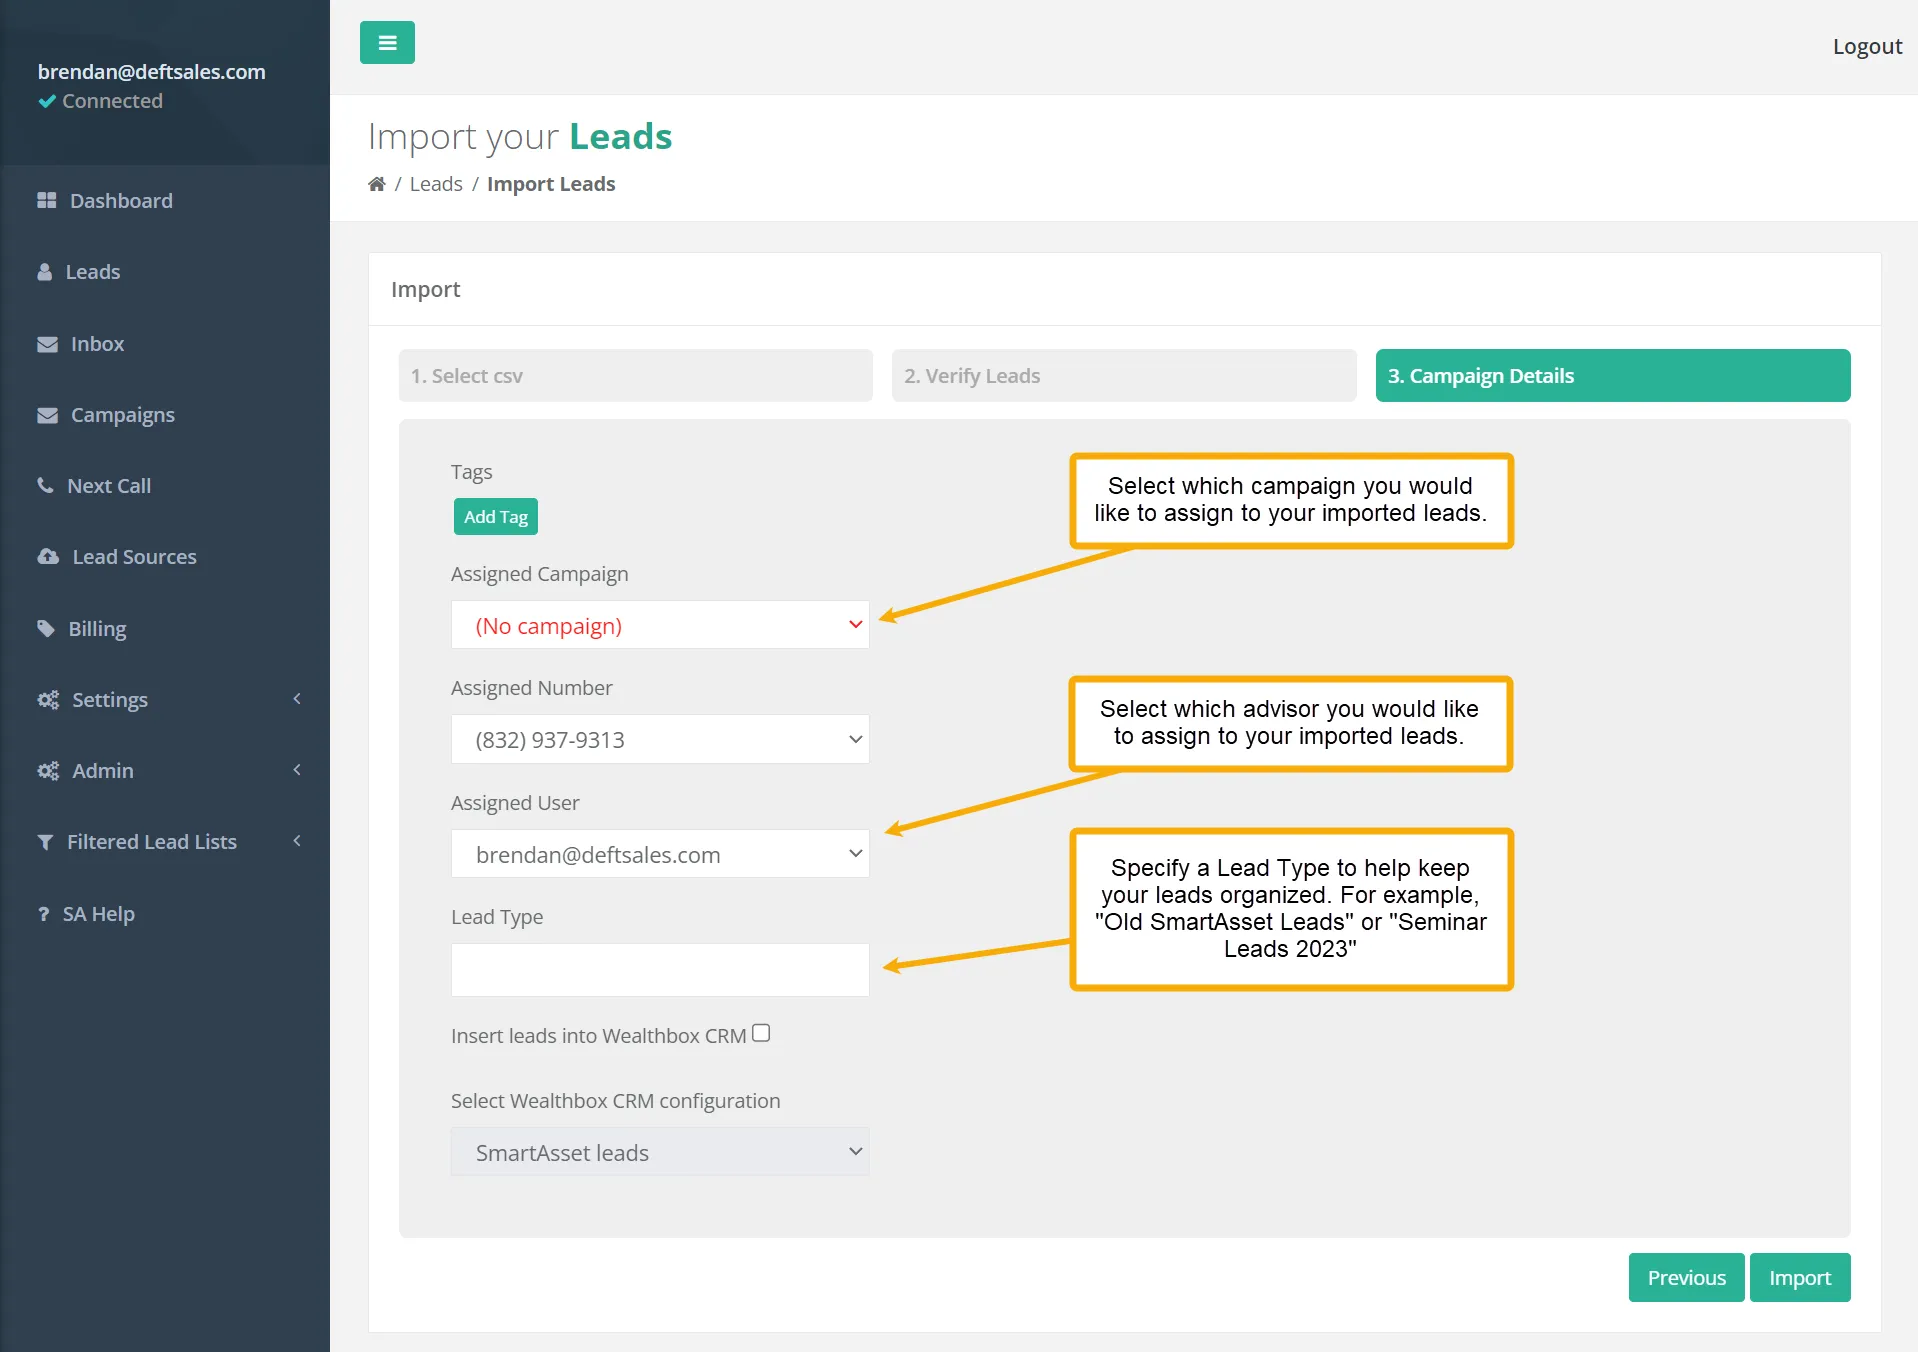
Choose the Tags, Assigned Campaign, Assigned Number, Assigned User, and Lead Type for the imported leads.
-
Optional: To send the leads to your CRM, select Insert leads into [CRM] CRM, then choose a configuration.
-
Click Import. A progress bar shows Importing leads…, then Completed.
To see the imported leads, go to Leads.
Template Rules
Section titled “Template Rules”- Keep the template’s columns in this order: FirstName, LastName, Email, PhoneNumber, ZipCode. A file with any other column fails with “Cannot find matching import type, please check to make sure csv headers are correct.”
- FirstName is required. Email is optional, but a lead without one gets no emails.
- An invalid email address or phone number shows an error, and the lead isn’t imported.
- Leads that are already in the file or already in OAT with the same name, phone, and email show an error and aren’t imported.
Express Consent
Section titled “Express Consent”OAT sends text messages only to imported leads who have consented to receive texts from you. To include texts in a lead’s campaign:
-
Add an Express Consent column after ZipCode.
-
In that column, enter the date the lead consented. The date can’t be in the future.
A file can include up to 50 leads with an Express Consent date.
Related Guides
Section titled “Related Guides”- Leads Screen: find and manage the leads you imported
- Campaigns: build the campaign you assign during import
- Tagging Leads: create and use the tags you can apply on import
- CRM Integration: connect a CRM so imported leads can be sent to it