

Lead Sources: Routing & Automation
The Lead Sources page controls what happens to each new SmartAsset lead. It sets which campaign starts, how the lead is added to your CRM, which phone number it sees, and who it’s assigned to.
By default, every lead follows the Default row. To handle some leads differently, add lead types; each gets its own row.
Before you begin
Section titled “Before you begin”- Every user you assign needs a connected email. See Connect your Email.
- Every campaign you assign needs at least one step.
- Some columns appear only if your company uses that feature: CRM Configuration (CRM), Assigned Number (OAT phone numbers) and Fast Call (calling).
Setting Up Your SmartAsset Lead Source
Section titled “Setting Up Your SmartAsset Lead Source”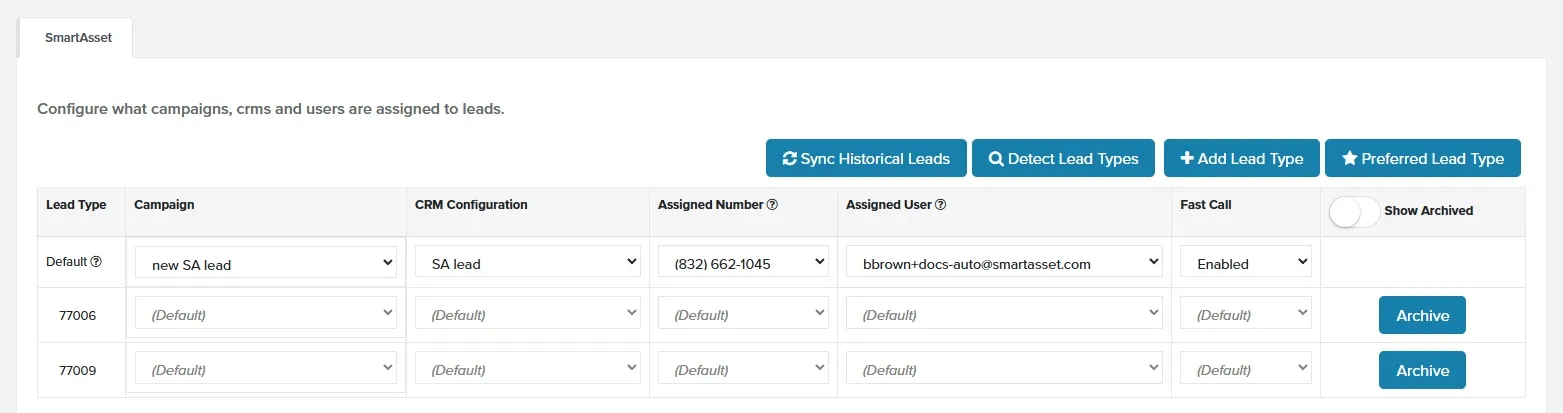
-
In the side nav, click Lead Sources. The Lead Sources page opens.
-
In the Default row, under Campaign, select a campaign.
-
Under CRM Configuration, select a configuration.
-
Under Assigned Number, select the phone number leads see when you call or text them.
-
Under Assigned User, select a user or a round robin.
-
Under Fast Call, select Enabled.
-
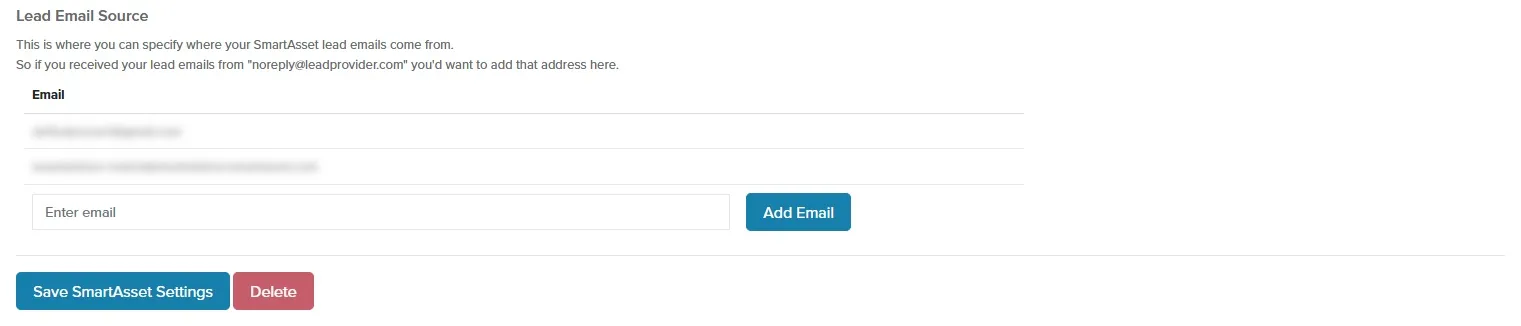
At the bottom of the page, click Save SmartAsset Settings. Your settings don’t take effect until you save.
If you see Cannot assign…, the user has no connected email or the campaign has no steps. Fix it and save again.
New SmartAsset leads now follow these settings.
What Each Column Does
Section titled “What Each Column Does”The Default row applies to every SmartAsset lead. A lead type row overrides it for matching leads; any lead type cell set to (Default) uses the Default row’s choice.
Campaign
Section titled “Campaign”New leads start the selected campaign. Choose (No campaign) to start none. Unapproved campaigns show (Unapproved) in red; see Understanding Campaign Approval.
If Live Connected is one of your preferred lead types, the Campaign dropdown is locked on its rows, because Live Connection leads don’t start a campaign.
CRM Configuration
Section titled “CRM Configuration”Sets how new leads are added to your CRM. Choose one of your configurations, (Just Contact Info) (Default row only), or (No CRM Configuration). (Just Contact Info) sends only contact details, and (No CRM Configuration) keeps those leads out of your CRM.
Assigned Number
Section titled “Assigned Number”The OAT phone number leads see when you call or text them. Default Phone uses your company’s default number.
Assigned User
Section titled “Assigned User”The user new leads are assigned to. Default User uses your company’s default user. To rotate leads among several users, select a round robin; see Round Robin Lead Assignment.
Fast Call
Section titled “Fast Call”Choose Enabled and OAT calls the assigned user as soon as a new lead arrives. See Live Connection vs Fast Call.
Using Lead Types
Section titled “Using Lead Types”Use lead types when some leads need different settings, such as a different campaign, phone number or user. Each lead type gets its own row, which overrides the Default row for matching leads.
By default, lead types are zip codes: the zip code each lead was matched on.
Choose How Leads Are Grouped
Section titled “Choose How Leads Are Grouped”-
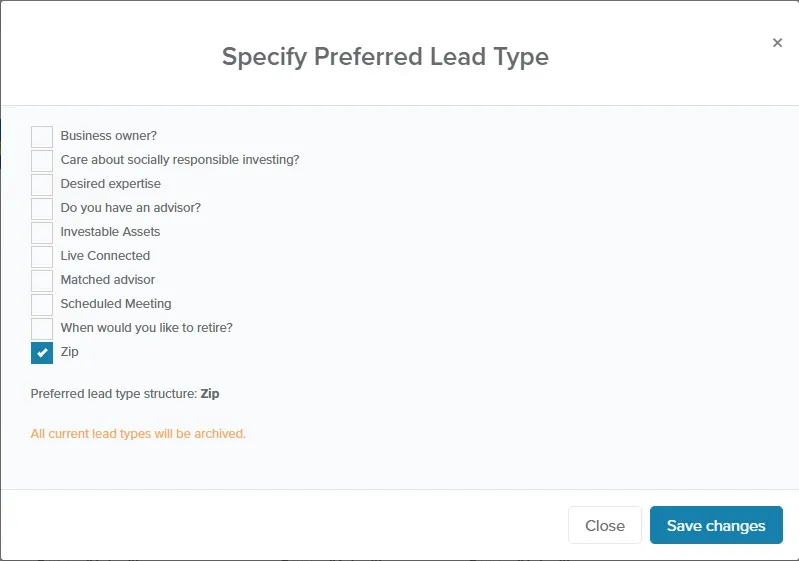
Click Preferred Lead Type. The Specify Preferred Lead Type window opens.
-
Select one or more categories, such as Zip, Investable Assets, Business owner? or When would you like to retire?.
-
Click Save changes. Every current lead type row is archived right away. To restore one, turn on Show Archived and click Unarchive.
Create Lead Type Rows
Section titled “Create Lead Type Rows”-
Click Detect Lead Types. OAT adds a row for each lead type found in your past SmartAsset leads.

-
In each new row, choose a value in each column you want to override. Leave the rest at (Default).
-
Click Save SmartAsset Settings. New rows aren’t kept until you save.

With two or more categories, a row’s lead type combines the values, for example 90210, Yes. Each new lead now gets the settings of the row that matches it.
To stop using a lead type, click Archive at the end of its row. It’s archived right away; to restore it, turn on Show Archived and click Unarchive.
Related Guides
Section titled “Related Guides”- Campaigns: when a campaign assigned here starts for a new lead
- CRM Integration: create the CRM configurations you assign here
- Round Robin Lead Assignment: rotate new leads among several users
- Live Connection vs Fast Call: how Fast Call differs from a Live Connection transfer